
Opening and building large Visual Studio solutions is a pain. A good way to put less stress on your rig is to start moving rarely changing parts of your code into NuGet packages. NuGet has been around already since 2010, tools are mature and battletested. NuGetizing some of your system makes parts of your code always prebuilt and tested (you are using tests right?). Offloading some of the building and tests will make your overall CI (Continuous Integration) process faster as well.
There are several steps involved when creating a NuGet packages, which involve:
- Making a .nuspec manifest file (which has the metadata)
- Building, testing and incrementing the build number
- Creating a .nupkg package file (essentially a zip file)
- Publishing the newly created package
You can perform all the aforementioned activities by hand, write a bat script or use a build server (like TeamCity). In this article, we’ll take the latter approach. Setting up a CI pipeline in TeamCity is super easy.
To begin with, create a new project, configure your version control settings and start setting up build steps.

The simplest way to change the build number is to increment the minor version (check Semantic Versioning). Every build will then increment the counter, which is not an ideal solution but will do for that example.
Build number now in place, we can use it in our assembly and NuGet package version. Before setting up the CI pipeline, configure the AssemblyInfo patcher, found under the Build Features:
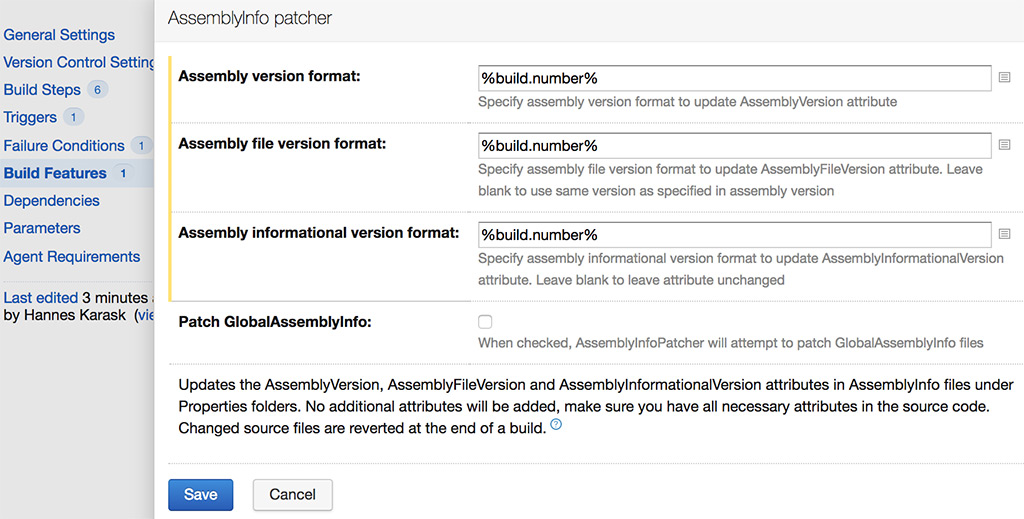
This will change the values in the Properties/AssemblyInfo.cs file.
We can now set up our build pipeline, on the example of fictitious logging library Foo.Common.Logging. The CI process consists of 6 steps:
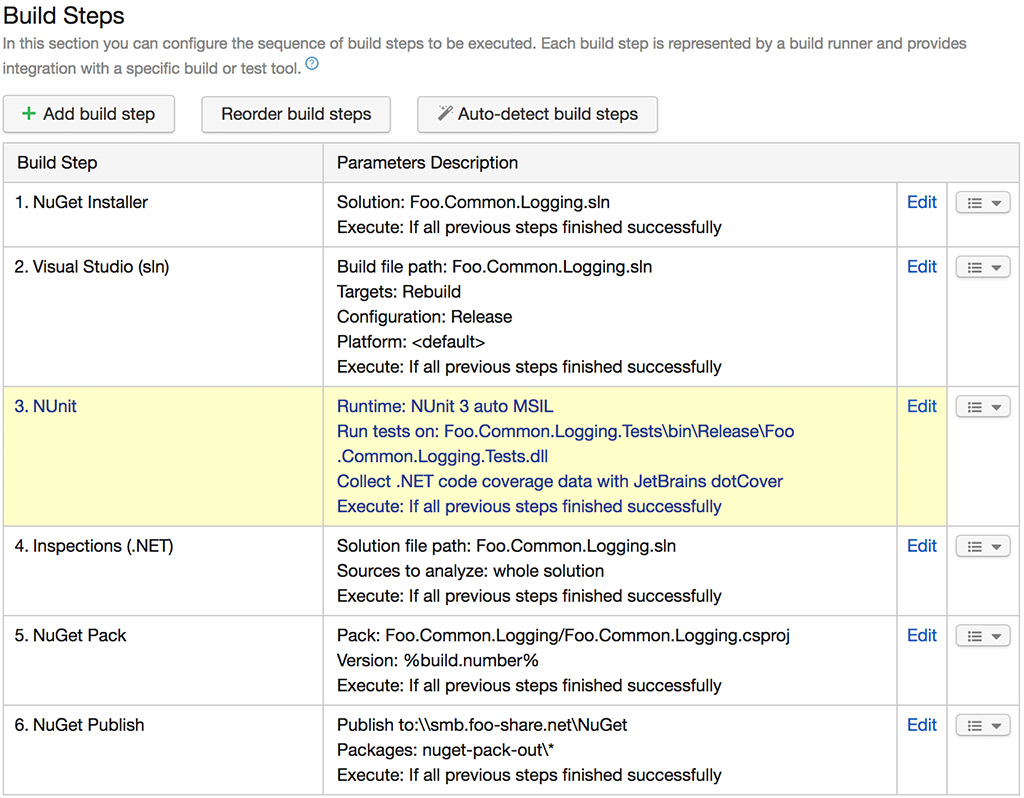
1. Restore all the NuGet packages used in the solution.
2. Build all the projects in the solution
3. Run unit tests with coverage report. You can set the pipeline to fail if test coverage drops under threshold.
4. ReSharper runs various inspection on your code, read more from their docs.
5. When all the tests and inspections are green, we can then pack the project into a NuGet package.
6. Publishes the NuGet package. Here we used a simple file share, but alternatively TeamCity can host the package feed or a real server.
You can start the pipeline either manually or configure a VCS trigger under Build settings > triggers.

Now sit back and enjoy your new automated NuGet packaging process!